#TP-Link extender setup
Explore tagged Tumblr posts
Visit Tumblr Blog
Explore Tumblr blogs with no restrictions, modern design and the best experience.
Last Seen Tumblr Blogs


Fun Fact
There are dozens of funny blogs to kill time on Tumblr.
Text
How to TP-link Extender Setup?
The tp-link extender setup can be performed using the WPS button. First, locate the WPS button on the back of the router and then on the extender. Next, press & hold the WPS knob on the router and then on the extender simultaneously, within 2 minutes. When the LED indicator turns on, release it. For more info, approach us!
0 notes
Text
Need assistance with how to setup tp-link extender? No worries! For this, open the web browser and type the tplinkrepeter.net web address in the browser. Now, enter your username & password and you will reach the setup wizard. Here, visit the advanced settings or reach out to us to learn the complete configuration steps!
0 notes
Text

How to Setup TP-Link extender?
TP-Link extender setup procedure is truly a straightforward process. To accomplish the process, plug your extender into a power outlet; connect your smart device to the extender either through a wireless or wired connection; access the setup page via web address, and finally follow the on-screen instructions. To acquire more information about your extender’s setup, connect with our professionals!
0 notes
Text
How to do TP Link Extender Setup?
To complete the TP Link extender setup, visit the user interface. To do so, you’ll require the default IP address & login credentials of your extender. After accessing the user interface, you must configure the router & WiFi settings. But if you face any TP Link setup issues, chat with our team to know how you can fix it.

0 notes
Text
A brief tutorial to Tp-link wifi extender setup
Tp-Link extenders are one of the top-mentioned range boosters that increase the network coverage of your router and eliminate dead zones in your living space. Similarly, if you buy a new extender, it is necessary to access the repeater's admin panel and perform the Tp-link wifi extender setup to utilize all of its functions.
In addition, the primary methods to set a repeater up are through the web address or the app. Likewise, both methods are convenient to use but you need to follow the steps carefully. In this brief tutorial, we explore the TP-Link repeater setup using the web address and also explain the suitable troubleshooting methods to fix the configuration errors.
Prerequisites for the Tp-link wifi extender setup
While you begin with the process of extender setup ensure you have all the necessary equipment, such as:
TP-Link WiFi extender
Stable network connection
Ethernet cable
Web address
Admin credentials
Computer/Laptop
Steps to setup the TP-Link extender
In this section, we briefly explore the steps to begin and complete the setup procedure. All you need is a stable internet connection, for this, you can also opt for a wired connection using an Ethernet cable. Now, let’s move towards the steps to configure your range extender:
First and foremost, plug your range extender and power it on.
Now, ensure that your computer is connected to the extender network.
Next, open the web browser and type the tplinkextender.net web address or 192.168.1.1 IP address.
Hereon, a login window appears to you on the screen.
Further, mention the username and password here.
After that, click on Quick Set Up> Next> Select your Region> Next.
Here, your extender scans for the available networks, so wait patiently.
After scanning, you have to check the list of available networks and select the one you want to go ahead with.
After that, tap on Next and another window displays the password of your selected network.
After typing the password, click on the Copy from the main router to continue with the single network or click on Customize to create a different network.
Further, tap on Next> Finish.
Lastly, you have completed the TP-link extender setup successfully, now continue error-free browsing.
How to troubleshoot the TP-Link extender setup issues?
Additionally, the setup issues are common when a non-tech person configures his repeater for the first time. These can be due to incorrect IP addresses, login details, unstable networks, or faulty hardware. So, the primary thing is to fix these issues but how? No worries! We explain here:
Check the admin details you enter to access the web interface of the extender.
Also, enter the correct web or IP address to continue with the setup process.
Examine the network cables you use for a wired connection. Replace if there is any damaged cable preset.
Ensure your internet connection is stable.
Look at the extender network that is connected to your smart device is active properly.
Fix the browser issues and update if needed.
Ensure an adequate power supply on your range booster.
All in all, the information we share with you will assist you in carrying out the Tp-link wifi extender setup process easily. Similarly, if you have issues with the configuration process of your range booster, then walk through our troubleshooting section. If need more info, then stay tuned to our website.
#Tp-link wifi extender setup#Troubleshooting tp-link setup issues#tp-link extender setup#tplinkextender
0 notes
Text

Start with a reliable TP-Link wifi extender setup if you're having trouble with poor WiFi coverage. By extending your current signal, this procedure can assist in removing dead zones. To get quick TP Link setup instructions, plug your device close to the router and then use your browser. To connect it to your network, go to the setup page and follow the instructions. You can relocate the device to a more convenient spot after it has been configured. For best results, make sure the placement is within range of your primary signal.
#tp link setup#tplinkrepeater#Tp link repeater login#tp-link wifi extender setup#tp link wifi extender setup#tp-link extender setup through mobile
0 notes
Text
If you are willing to access the TP-Link Extender Setup Page, all you need to do is open a web browser on your desktop and then enter either your extender’s web address- tplinkrepeater.net or IP address-192.168.0.254 in the address bar. Afterward, type the login credentials. In case you have to face any difficulty while accessing the setup page of your extender, it is better for you to give us a call!
0 notes
Text
How to install TP-Link wireless router | +1-800-487-3677 | Tp-link Guide

We at tp-link support provide the best technical solution for Router Setup, router login password reset and all kinds of troubleshooting with wireless tp link router. You may call on our toll free : +1-800-487-3677.
Content : You've purchased a TP-Link Router and can hardly hold on to have your new web speed. In this article, we'll make sense of in 4 stages how for set up your switch. What's more, we've recorded the most widely recognized inquiries for you. Like that, you should rest assured that you can utilize your switch ideally.
Stage 1: track down the best spot for your switch
Stage 2: associate your links to the switch
Stage 3: actually take a look at the lights in your switch
Stage 4: sign in to your switch and set up your organization
1
Track down the best spot for your switch
Contemplate where you need to put the switch before you set it up. You'd, all things considered, need to put your switch in a focal spot. On the off chance that you have a house with 3 stories, you ideally put it on the subsequent floor. You could require a more extended Ethernet link to interface your modem to your switch. Ensure you don't mount the switch before you've tried the speed in the house. Perhaps you need to put it closer towards your concentrate after the test.
2
Interface links to the switch
Mount your switch or put it down with the receiving wires facing up. Then, interface the Ethernet link of your modem or from the wall to the WAN port of your switch. This is the orange Ethernet port. Boot your modem once more and associate the power connector to your switch. Sit tight two or three minutes for the power light to be on ceaselessly.
3
Reset your switch in the event that the establishment doesn't work
Sign in to your WiFi organization
Still don't have a remote association with your switch? Interface your gadget to one of the LAN ports of your Bowman through an organization link. You ought to likewise check whether the initial 4 lights of your switch are still on. Provided that this is true, reset the switch again with the reset button. You'll track down this button on the rear of your switch. This little button is right underneath the WPS button.
For more info you may call on our toll free :+1-800-487-3677
1 note
·
View note
Text
artline 400xf
Zayzi Inc: South Africa’s One-Stop eCommerce Powerhouse for Office, Tech & School Essentials
In an increasingly crowded eCommerce landscape, standing out means offering more than just a product—it means providing a seamless, comprehensive, and customer-first experience. That’s exactly what Zayzi Inc does, and it’s the reason they’ve become a go-to destination for thousands across South Africa looking for stationery, tech, school supplies, and office essentials—all under one digital roof. What sets Zayzi Inc apart from competitors is its all-in-one product ecosystem combined with curated affordability and unbeatable variety, tailored to everyday professionals, students, and home users alike.
A Unique Blend of Everyday Necessities and High-Value Technology
Unlike most eCommerce platforms that either specialize in electronics or focus solely on office supplies, Zayzi Inc merges both worlds, giving customers access to a highly diverse product range. Need a glue stick 43g, print paper A4, and a 64GB flash drive at a competitive price? Zayzi has you covered—all in one transaction. This seamless accessibility eliminates the need to shop from multiple stores, saving both time and shipping costs.
Even within their categories, Zayzi Inc excels in offering brand-specific, high-demand items like:
Amos glue stick for classrooms and crafts
Stabilo highlighters for vibrant studying
Artline permanent marker 70 and Artline 400XF for precision labeling
Claro pens and HB pencils 12 pack for everyday writing
And for tech-savvy users, Zayzi carries top-tier gadgets like:
Lenovo IdeaPad 3 i3 laptops
Mecer Android Tablets
Pantum multifunction printers
TP-Link 300Mbps Wi-Fi Range Extenders
Exceptional Value for Schools, Offices, and Families
Zayzi Inc shines brightest in environments that demand bulk purchasing with quality assurance—like schools and office environments. From copy paper to labelling machines, Bantex filing boxes, and post-it flags, Zayzi acts as a silent but crucial productivity partner.
Parents will also love Zayzi’s affordability and practicality, whether it's for maths sets, 50-pocket flip files, or permanent white markers. Even niche needs like adhesive for tape or Decifix covers are handled effortlessly.
What Makes Zayzi Inc Truly Stand Out?
Product Range Depth & Breadth Whether it's an office, classroom, or home study setup, Zayzi Inc has the variety to meet any requirement—something few eCommerce competitors can replicate at this scale.
Affordable Technology at Your Fingertips With constant updates on devices like Lenovo i3 laptops and fast-moving gadgets, Zayzi remains tech-relevant without overpricing.
Streamlined Shopping Experience The site’s layout is intuitive, category-rich, and search-friendly, making it easy to find what you need—whether it's a frixion pen or a magic tape.
Local Stock with Nationwide Reach Products ship efficiently from within South Africa, ensuring faster delivery times and localized support—a major advantage over international resellers or dropshipping sites.
Customer-Centric Service Zayzi’s responsiveness and dedication to fulfilling orders with speed and accuracy have earned them a reputation for reliability among repeat buyers.
Conclusion
Zayzi Inc isn’t just an online store—it’s a smart supply partner for South African households, businesses, and educational institutions. With everything from a glue stick 43g to a 64GB flash drive at a great price, this platform offers the tools, tech, and trust you need—all in one place.
Visit Zayzi Inc today and experience a smarter, simpler way to shop for your everyday essentials.
0 notes
Text
Guide For TP-Link Extender Setup
You can easily proceed with the TP-Link extender setup by logging into the extender’s user interface and following the instructions to set up your TP-Link extender. For the login, you require the default IP address, username, and log in. Also, you can set up the extender using the WPS button. If you face issues during the login process, connect with our experts and they'll guide you through.
0 notes
Text
How to Use Tplinkextender.net ?
If you're having trouble accessing Tplinkextender.net, don't worry! Our guide makes it easy to log into your TP-Link extender and get your network running. Whether it’s a setup issue or fixing a weak signal, we’ve got you covered. For further assistance, contact us through our website for expert help to resolve any problems quickly!

0 notes
Text
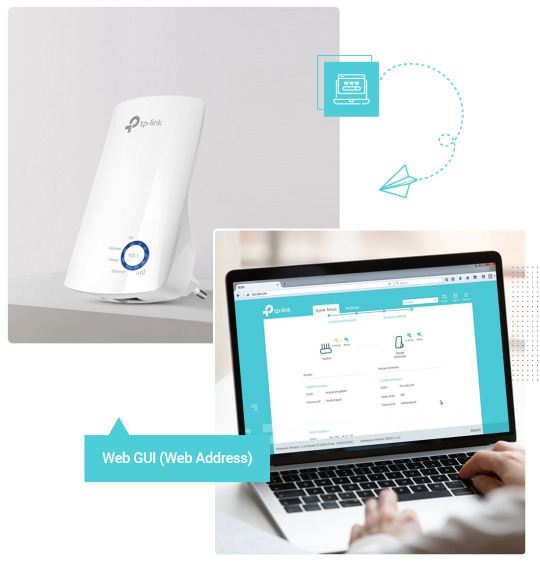
Achieve Seamless Coverage With TP Link Extender Setup
Got your hands on TP link range extender and thus want a simplified and straightforward setup steps? If the answer is yes, then you are surely at the right destination. In this guide we'll share two most commonly used TP link extender setup methods. One is extremely quick that just takes less than 10 minutes. It is the WPS method. Whereas if you want a more hands on approach then Web GUI method is for you. Both the setup methods are extremely easy and can be performed without any expert help. So let's not waste any more time and dig straight into the process.
✓ Quick Setup Via WPS
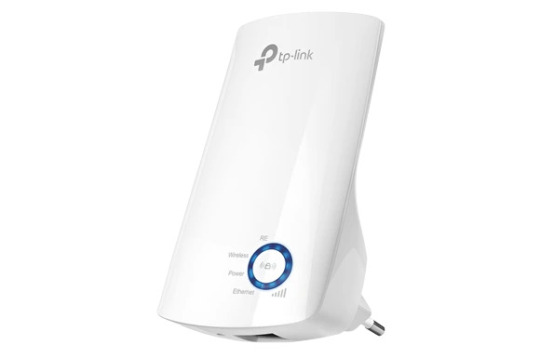
Begin the process of TP Link extender setup by activating the range extender. Make sure you do this activation nearby to the host router. Meanwhile the extender is booting up, check the status of the host router. It should be actively working.
Moving further, first push the WPS key on the TP link range extender. In case the WPS LED didn't blink then push and hold the WPS key until the LED starts blinking.
Now it's time to push the WPS key on the host router. Here also make sure the WPS LED starts to blink. As this is the indication that the WPS function is enabled and the device is looking for its pair. Additionally remember, as soon as you push the WPS key on the TP link extender do not wait. Rather immediately push the WPS key on the router as well.
Now let the gadgets complete the synchronisation. As the TP Link extender setup process completes the wireless signal LED will light up. In case it doesn't light up, then it means the WPS connection has failed. So you need to redo the setup all over again. But in case everything went smooth, then it's time to relocate the extender to its desired location.
For placement select the area which is halfway from the host router and the area where you need coverage. Now as you replug the range extender, you’ll see both WPS LED as well as wireless signal LED light up. This indicates a successful setup.
✓ Manual Setup Using Web Browser
For conducting a smooth TP Link extender setup first collect the basic components and details. You need a smart gadget for initiating the setup. It can be anything like your smartphone, laptop, computer or an iPad. Next for a stable connectivity to the extender you need an Ethernet wire. Additionally, collect the username and password of your existing wifi network whose reach you want to extend. Further we advise you to keep the user manual by your side as it contains every little detail that you might need during the setup process. As you collect all these components and details, feel free to start with the setup steps:
✓ Activate The TP Link Extender
Begin the process by first bringing in the range extender to the same area where your host router is placed. Now avoiding any physical barriers plug in the range extender to activate it properly. Once done, now bring in the smart gadget. For the TP Link extender setup you need to connect this smart gadget to the extender. Now there are two methods for the same.
Either you can connect wirelessly or through ethernet wire. The details for wireless connection are written clearly on the product label which is stuck on the back panel of the extender. Additionally the details are written in the quick user manual as well. Once you build a connection between the TP Link extender and smart gadget, you can move to the next step which is Log In.
✓ Log In
To login first launch a web browser of your choice. You can go with Internet Explorer, Safari, Firefox or Google Chrome as well. Now hop on to the address field of the browser. In it fill up http://tplinkrepeater.net and press Enter. In case the web address doesn't work, then use another alternative which is http://192.168.0.254. As you press the enter key, a window pops up asking you to give in some details. So you need to enter your username and password. By default it is set to admin which you need to use in lower case only.
✓ Follow The Prompts
To complete the TP Link extender setup, now you need to follow the on-screen prompts one by one. So start by selecting the Quick Setup option and hit Next. Moving further, pick your region and hit Next. Now the web interface will automatically start scanning for the available networks. From the list choose your network name and give in its security key (password). Finally review all your settings and tap on Finish if it's appropriate. As you do so the extender will reboot itself. As it applies the changes.
Lastly, check the wireless signal LED to know whether the setup is successful or not.
0 notes
Text
You can easily proceed with the TP-Link extender setup process. All you need to do is log into the extender’s web interface and follow the instructions to set up the extender. For the login, you require the default IP address, username, and login. Also, you can set up the extender using the WPS button. If you face any setup issues, check out the troubleshooting guide on our website.
0 notes
Text
How to Fix Common Issues During WiFi Extender Setup

Problems with the TP-Link wifi extender setup? Here's how to fix typical installation issues and have your extender operating at its best.
Make sure you're connected to the extender's WiFi first if the setup page at tplinkrepeater.net won't load. Another option is to use the IP address listed on the label. Changing browsers or clearing your browser's cache can be helpful.
When users enter the incorrect WiFi password when setting up a TP-Link extender, another problem occurs. Before continuing, always make sure your credentials are correct. During the setup procedure, try moving the extender closer to the router if it is unable to locate your primary network.
Restart the router and the extension if they both display a connection, but there is no internet access. To verify that the connection was successful, repeat the TP-Link Range Extender Setup Process.
Is the extender causing slow internet? This could be the result of bad positioning. The extender should not be placed behind heavy furniture or in corners. Locate an area with a strong signal by using the LED indicators on the device.
Holding down the reset button for ten seconds will reset everything if you ever need to. Then follow the following instructions to begin again.
By following these guidelines, you can experience greater wireless coverage without any disruptions and a more seamless TP-Link wifi extender setup.
#tplinkrepeater#tplinkrepeater.net#tp link setup#tp link extender setup#tp-link wifi extender setup#tp link range extender setup#http tplinkrepeater net#tplinkrepeater login
0 notes
Text
The Best 4G Router for Your Car: Stay Connected on the Road
Description: Discover the best 4G router for your car or outdoor adventures. Stay connected with fast, reliable internet wherever you go. Perfect for road trips, camping, or remote work.
Introduction In today’s fast-paced world, staying connected is no longer a luxury—it’s a necessity. Whether you’re on a road trip, camping in the wilderness, or working remotely from your vehicle, having a reliable internet connection is crucial. This is where the best 4G router for cars and outdoor use comes into play. In this article, we’ll explore the top 4G routers designed for vehicles and outdoor environments, ensuring you stay connected no matter where your journey takes you.
Why You Need a 4G Router for Your Car
Seamless Connectivity on the Go A 4G router for your car ensures you have a stable internet connection while traveling. Whether you’re streaming music, navigating with GPS, or video calling, a reliable router keeps you connected.
Perfect for Remote Work With the rise of remote work, many professionals are turning their cars into mobile offices. A 4G router allows you to work efficiently from anywhere, even in areas with weak Wi-Fi signals.
Ideal for Outdoor Adventures Camping, hiking, or RV trips often take you to remote locations with limited connectivity. A 4G router ensures you stay connected for emergencies, navigation, or entertainment.
Key Features to Look for in the Best 4G Router When choosing a 4G router for your car or outdoor use, consider the following features:
High-Speed Connectivity: Look for routers that support 4G LTE speeds for fast and reliable internet.
Portability: Compact and lightweight designs are ideal for travel.
Battery Life: Long-lasting batteries ensure uninterrupted connectivity.
Durability: Outdoor routers should be weather-resistant and rugged.
Easy Setup: User-friendly interfaces and quick installation are essential.
Top 4G Routers for Cars and Outdoor Use
1. Netgear Nighthawk M1 Mobile Router
The Netgear Nighthawk M1 is widely regarded as one of the best 4G routers for cars and outdoor use. It offers blazing-fast 4G LTE speeds, supports up to 20 devices, and features a long-lasting battery. Its compact design makes it perfect for travel, and the intuitive interface ensures easy setup.
Key Features:
Download speeds up to 1Gbps
5040mAh battery with up to 24 hours of use
Dual-band Wi-Fi for seamless connectivity
2. Huawei E5787 Mobile Wi-Fi Router
The Huawei E5787 is another excellent choice for car and outdoor use. It supports 4G LTE Cat6 speeds, ensuring fast and stable internet. The router is compact, lightweight, and features a user-friendly touchscreen display.
Key Features:
Download speeds up to 300Mbps
3000mAh battery with up to 12 hours of use
Supports up to 10 devices simultaneously
3. TP-Link M7350 4G LTE Mobile Router
The TP-Link M7350 is a budget-friendly option that doesn’t compromise on performance. It offers reliable 4G LTE connectivity, supports up to 10 devices, and features a compact design.
Key Features:
Download speeds up to 150Mbps
2550mAh battery with up to 8 hours of use
Easy-to-use interface
4. Alcatel Linkzone MW41NF 4G LTE Mobile Router
The Alcatel Linkzone MW41NF is a lightweight and portable 4G router ideal for car and outdoor use. It offers reliable connectivity and supports up to 15 devices.
Key Features:
Download speeds up to 150Mbps
2000mAh battery with up to 6 hours of use
Compact and travel-friendly design
How to Choose the Best 4G Router for Your Needs
Assess Your Usage: Determine how many devices you’ll connect and the type of activities you’ll be doing (streaming, gaming, remote work, etc.).
Check Coverage: Ensure the router supports the frequency bands used by your mobile carrier.
Consider Battery Life: If you’ll be using the router for extended periods, opt for a model with a long-lasting battery.
Evaluate Portability: Choose a compact and lightweight router for easy travel.
Tips for Maximizing Your 4G Router’s Performance
Position the Router Properly: Place the router in a central location for optimal signal strength.
Use an External Antenna: For areas with weak signals, consider using an external antenna to boost connectivity.
Monitor Data Usage: Keep track of your data consumption to avoid overage charges.
Secure Your Network: Use strong passwords and encryption to protect your connection from unauthorized access.
Conclusion Investing in the best 4G router for your car or outdoor adventures is a game-changer. Whether you’re working remotely, streaming entertainment, or staying connected during emergencies, a reliable 4G router ensures you’re never left without internet. The Netgear Nighthawk M1, Huawei E5787, TP-Link M7350, and Alcatel Linkzone MW41NF are all excellent options to consider. Choose the one that best fits your needs and enjoy seamless connectivity wherever your journey takes you.
1 note
·
View note